MyIP Access – Quick Start Guide
Overview
MyIP Access automates updates to your AWS Security Groups so your current live IP is always whitelisted for SSH, RDP, or custom ports. No more manual changes in the AWS Console — MyIP Access keeps your access rules current and secure.
Prerequisites
- An AWS Account with IAM permissions (to create roles and policies)
- Access to your AWS Management Console
- At least one Security Group for SSH/RDP access
Step 1 – Create IAM Policy for MyIP Access
Define a least-privilege policy that lets MyIP Access act on the security groups you nominate.
Build the policy
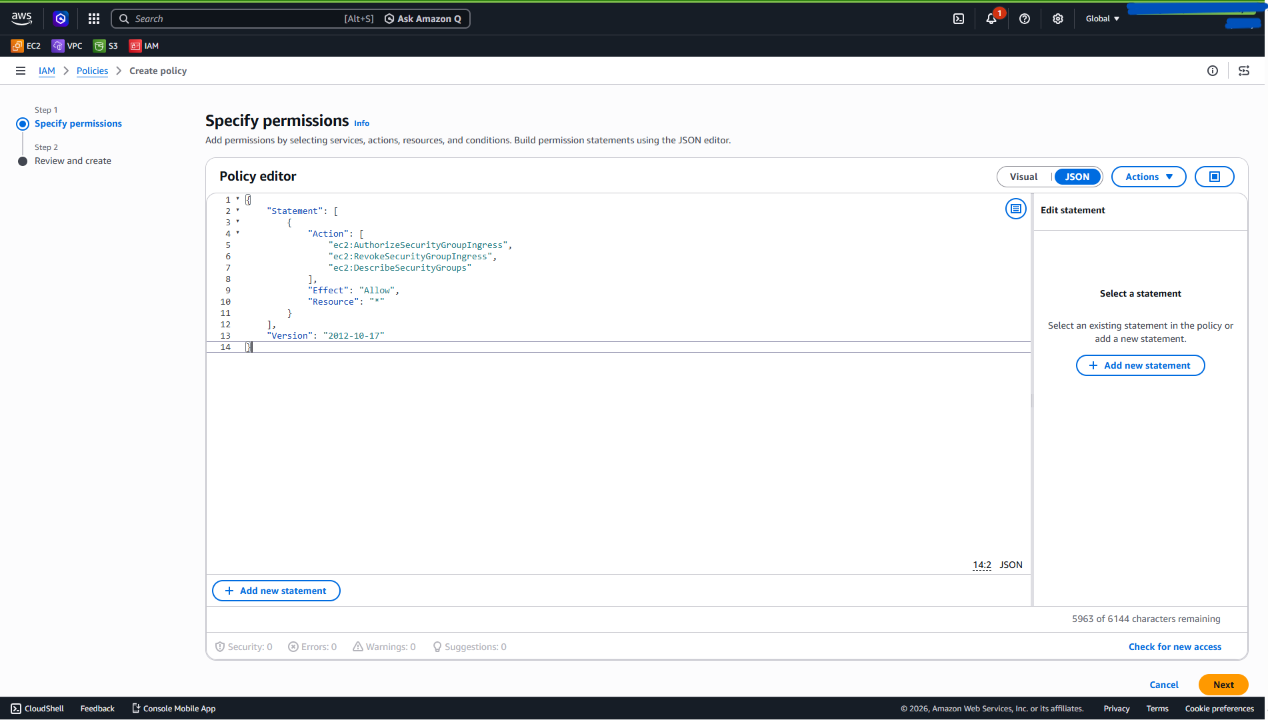
- In the AWS Console, open IAM → Policies → Create policy.
- Switch to the JSON editor.
- Paste the policy JSON below:
{
    "Version": "2012-10-17",
    "Statement": [
        {
            "Effect": "Allow",
            "Action": [
                "ec2:AuthorizeSecurityGroupIngress",
                "ec2:RevokeSecurityGroupIngress",
                "ec2:DescribeSecurityGroups"
            ],
            "Resource": "*"
        }
    ]
}
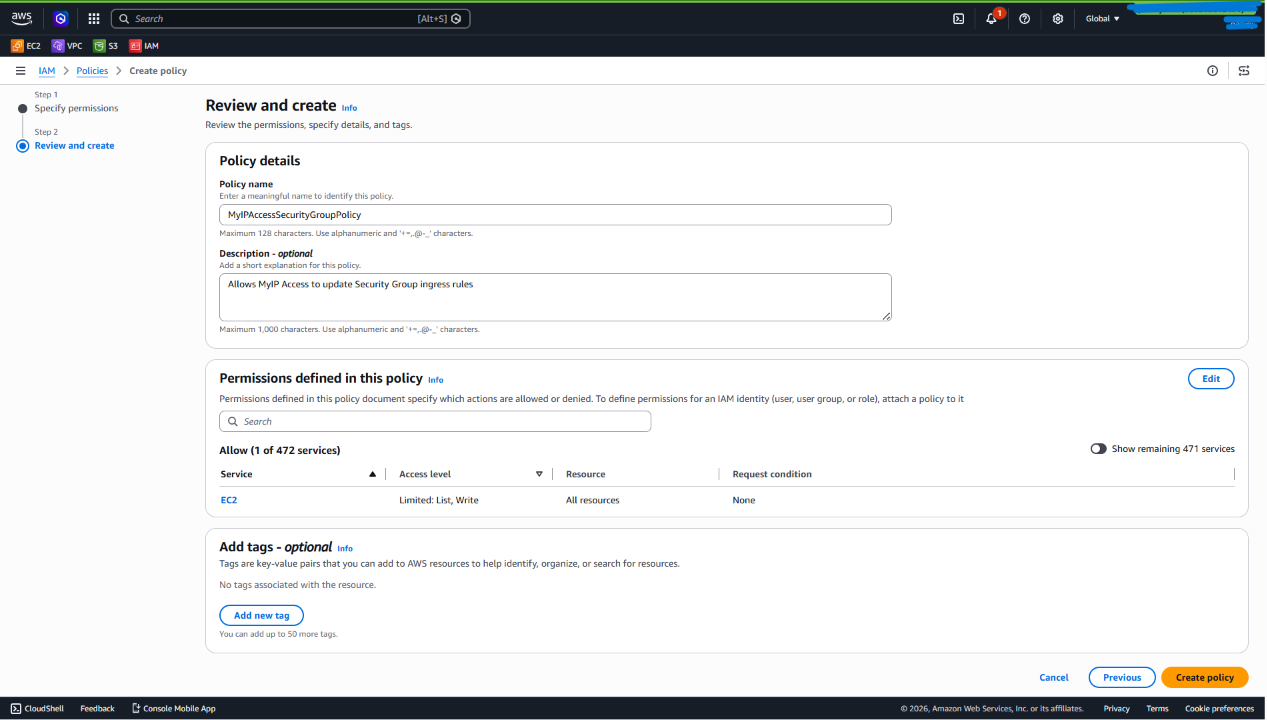
Click Next, name the policy (for example MyIPAccessSecurityGroupPolicy), and create it.
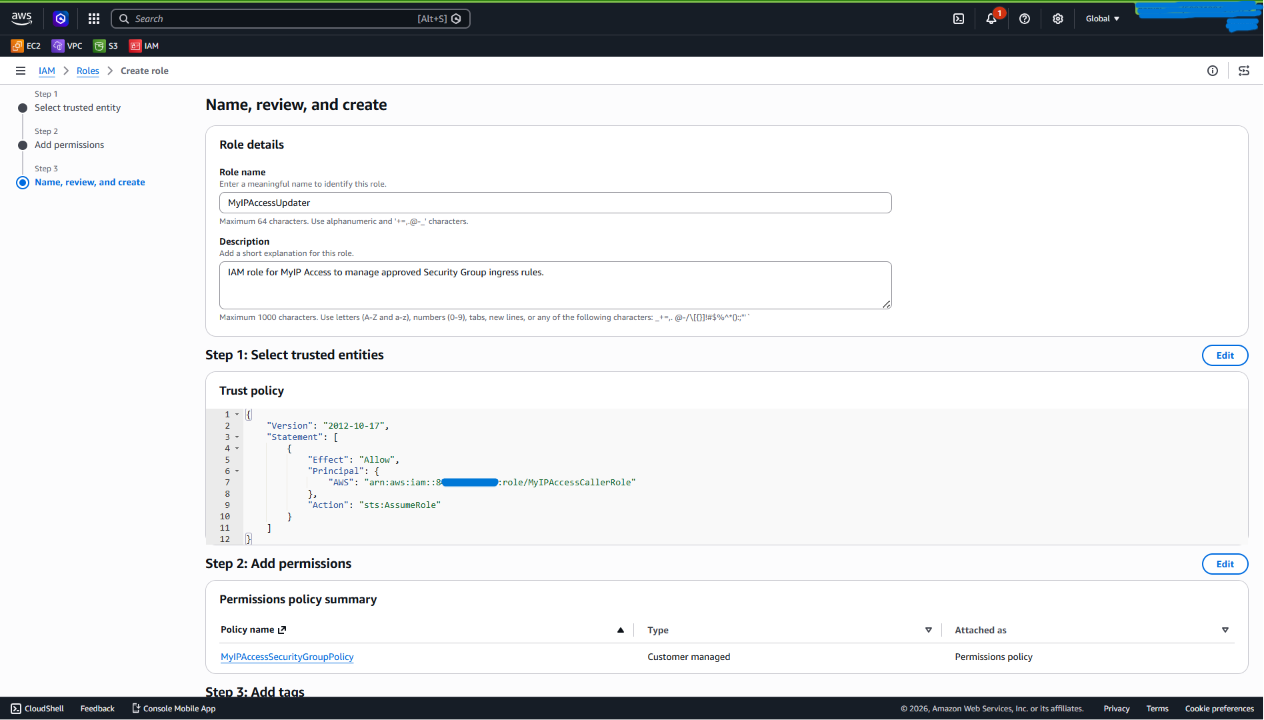
Step 2 – Create IAM Role for MyIP Access
This role is assumed by MyIP Access whenever an IP sync runs.
Configure the role
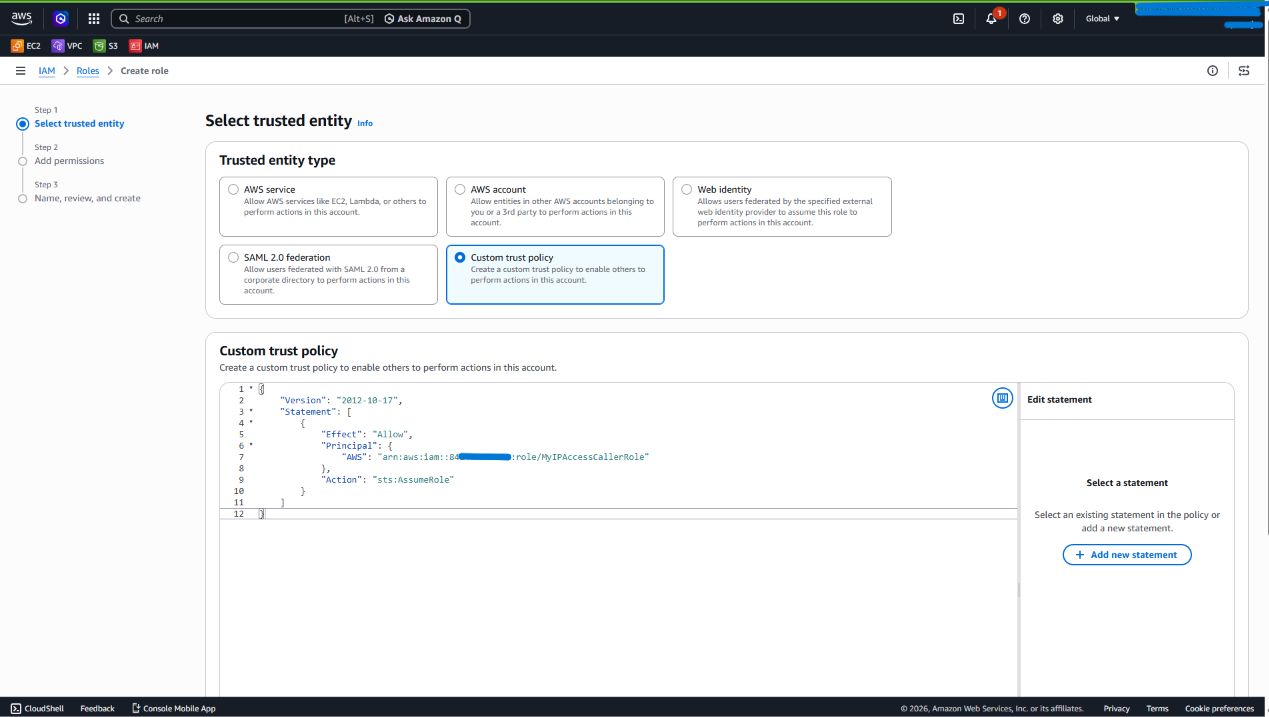
- Go to IAM → Roles → Create role.
- Select Trusted entity type → Custom trust policy.
- Enter the MyIP Access AWS Account ID shown in your dashboard.
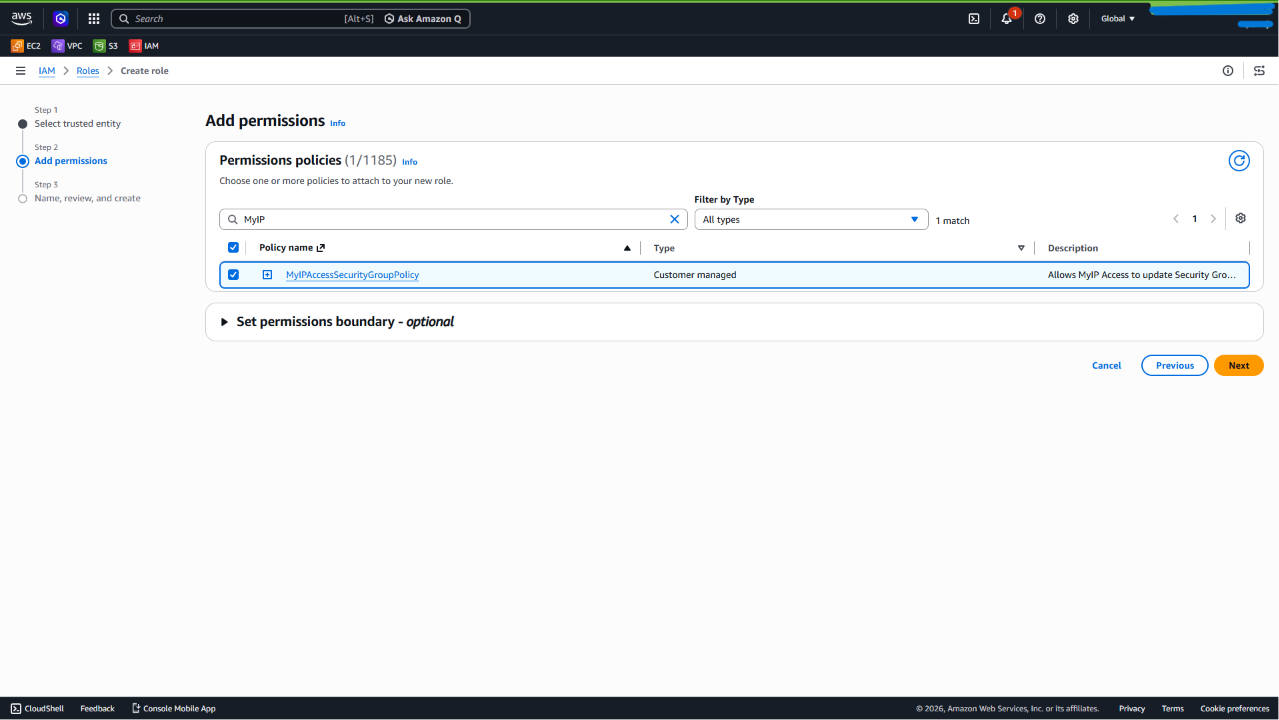
- On the permissions page, attach the policy you created in Step 1.
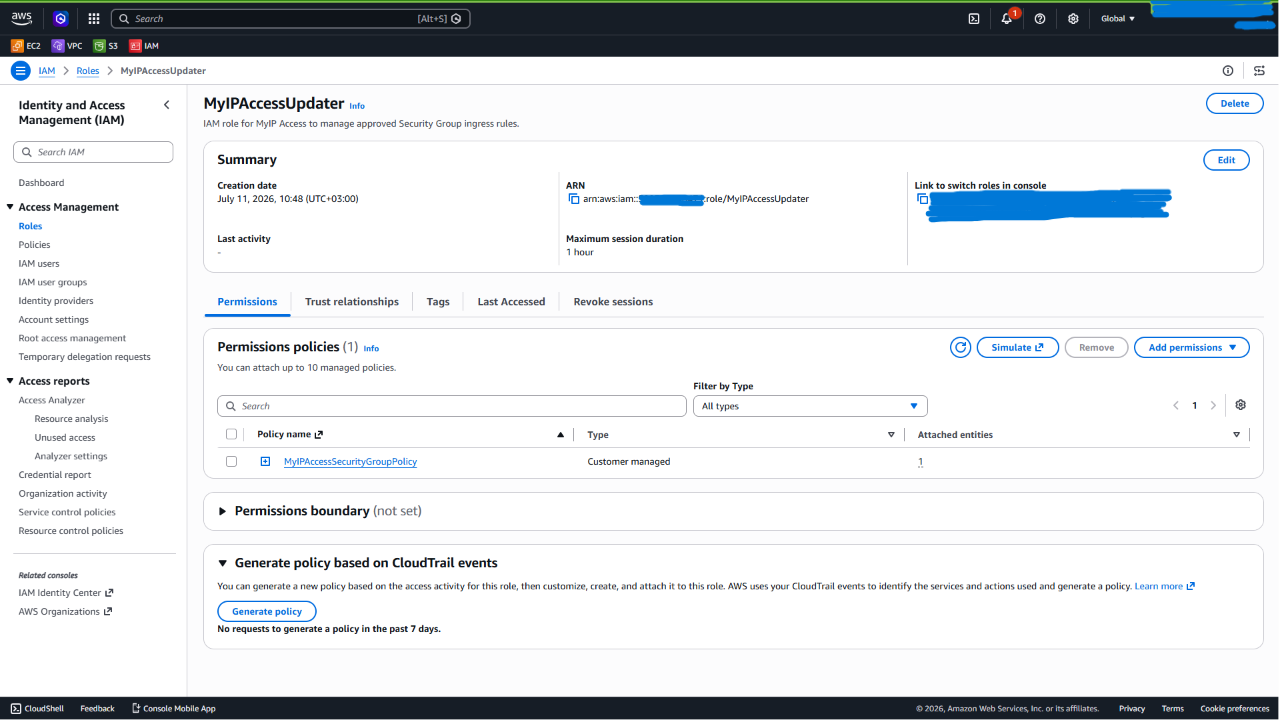
- Choose a role name such as MyIPAccessUpdater and create the role.
Trust policy template
After the role is created, confirm the trust policy matches your caller. Use this template as guidance:
{
    "Version": "2012-10-17",
    "Statement": [
        {
            "Effect": "Allow",
            "Principal": {
                "AWS": "arn:aws:iam::<myipaccess-aws-account-id>:role/MyIPAccessCallerRole"
            },
            "Action": "sts:AssumeRole"
        }
    ]
}
Replace <myipaccess-aws-account-id> with MyIP Access provided AWS account ID; you can get it from the AWS Integration dashboard.
Step 3 – Connect the Role to MyIP Access
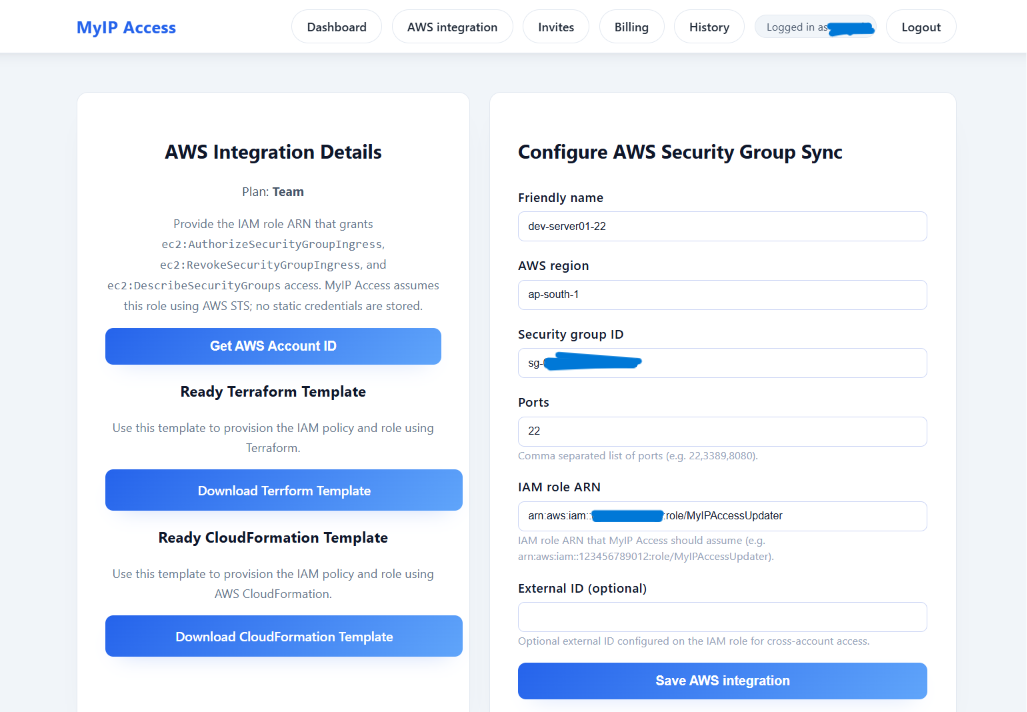
- Log in to MyIP Access and open AWS integration.
- Enter a friendly name, AWS region, security group ID, and the ports MyIP Access should manage.
- Paste the IAM role ARN copied from AWS.
- Save the AWS integration.
Step 4 – Update Your IP
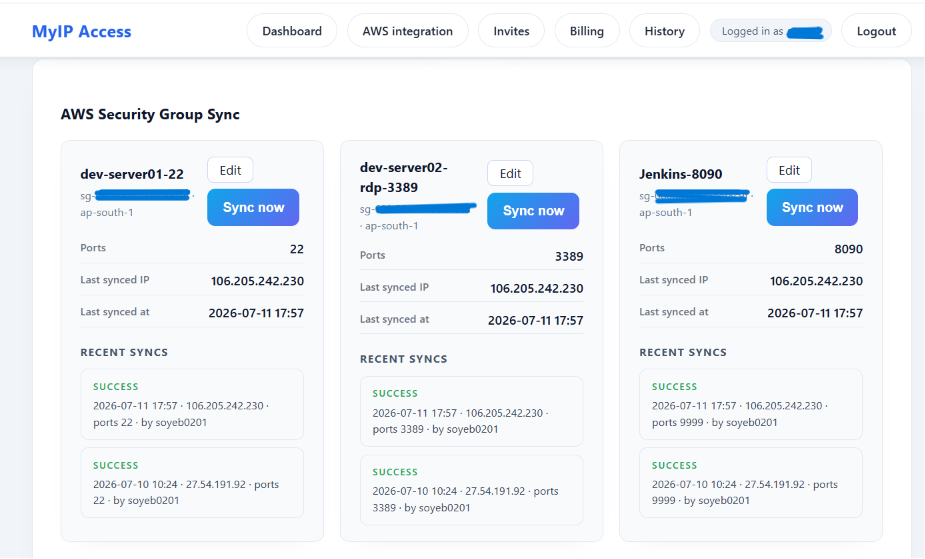
- From the dashboard, select your integration.
- Click Sync now to whitelist your current public IP.
Each update is logged with timestamp, ports, and user so you retain a complete audit trail.
Use Terraform or CloudFormation
If you prefer infrastructure as code, use the ready templates to create the IAM policy and role instead of creating them manually in the AWS Console.
Template downloads require a registered MyIP Access account. After signing in, organization admins can download Terraform and CloudFormation templates.
Troubleshooting & Next Steps
- Access denied? Confirm the IAM role has the policy above.
- Updates failing? Ensure the integration targets the right security group and region.
- Need help? Email us at contact@kloudpages.com.
Next, invite teammates and enable Slack or webhook alerts from the integrations page.